Nabto Edge Tunnel Video Example for Android
Nabto Edge Tunnel Video is an end-to-end Android application that showcases how a client application may use the Nabto Edge Client SDK to securely tunnel a remote RTSP video stream.
This guide will walk you through step by step until you have a working Nabto Edge Video setup with a client application and a device that can communicate directly with each other. The device will expose an RTSP video stream for Nabto Edge Video to display to the client.
After following the guide, you will be able to view an RTSP video feed tunnelled through Nabto Edge:

The example applications in this guide are all pre-compiled versions to get you started quickly. The source code is available for both the Android app and the device tunnel application.
Alternative: Simplified Example
The Nabto Edge Tunnel Video Example described in this guide handles pairing and device management as you would expect in a production ready app. This adds quite some complexity, so if you just want to study the implementation of the simplest possible example of streaming video through Nabto, we have simpler example for that (separate guide in the github README).
The simpler example strips all access control and requires a correspondingly simple tunnel device application in front of the RTSP server - ie, use the simple_tunnel instead of the production ready device tunnel application used in this guide.
Note that the simple example should NEVER be used for production as the whole purpose is to strip away all access control measures!
Install Android App from Google Play
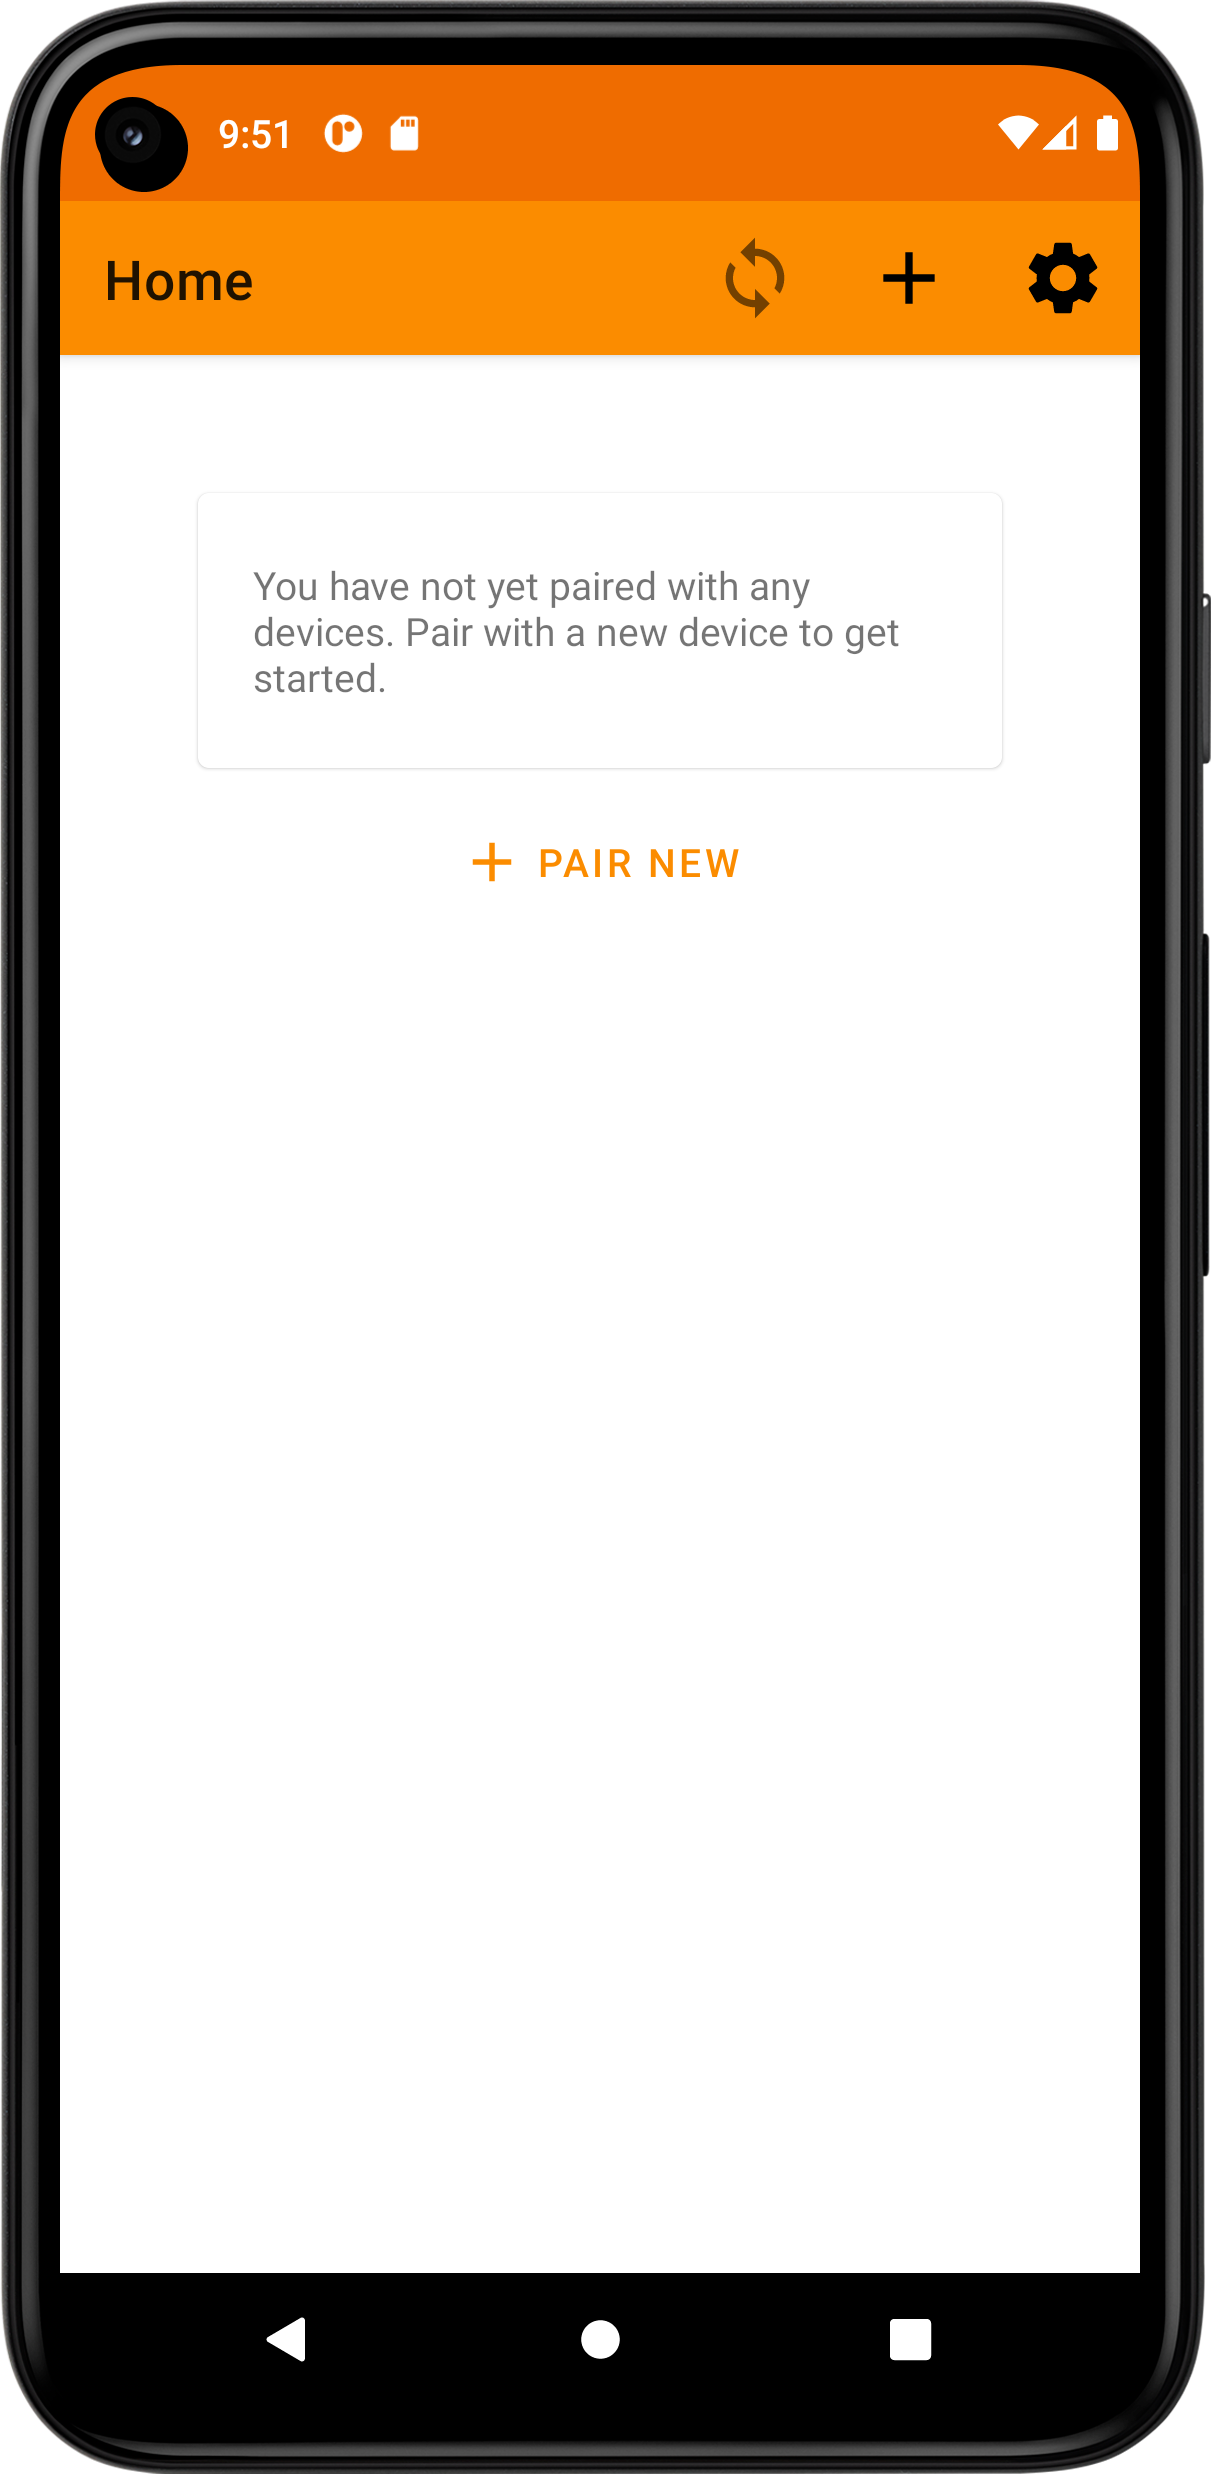
First, an Android phone is required. Go to Google play at https://play.google.com/store/apps/details?id=com.nabto.edge.tunnelvideodemo and install Nabto Edge Video. After installation, find “Nabto Edge Video” on your phone and open it. You should be greeted by the following screen.
Start an RTSP service
For testing purposes we provide a Docker container that starts up an RTSP stream and exposes it to port 8554 on localhost. If you have your own RTSP stream and the knowhow then feel free to skip this section and continue to the next step.
Head to https://github.com/nabto/rtsp-demo-container and follow the instructions to start a RTSP stream on the URL
rtsp://127.0.0.1:8554/video
Initialize Nabto Tunnel
Next we will download an example device that can run on a desktop platform (macOS, Windows or Linux). The source code is also available so you can build for your exact system or make changes as needed. In production you would run the Nabto embedded device software on a microcontroller or similar.
- Go to https://github.com/nabto/nabto-embedded-sdk/releases
- Download the latest
tcp_tunnel_device binaryfor your platform (linux, macOS or windows). - Run the binary with
./tcp_tunnel_device
The tcp_tunnel_device executable will save its configuration and state files in its home dir. The home dir defaults to $HOME/.nabto/edge on Unix and %%APP_DATA%%/nabto/edge on Windows. The home dir can be changed with --home-dir.
Note that you will get an error that tells you to make a device.json file. This file will inform the device executable which product id and device id it should use when connecting to the Nabto Edge platform. How to obtain this information is described in the following.
In Nabto Edge, devices are organized into products, so you need both a product id and a device id. Products and devices can be registered in the Nabto Cloud Console which is the next step.
Create device in the cloud console
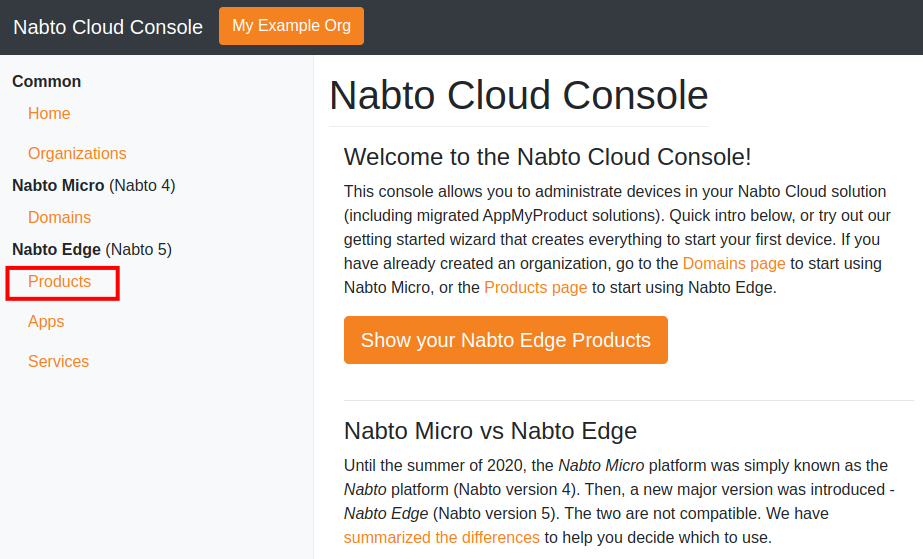
In this step we create and configure a Nabto Edge device. Go to https://console.cloud.nabto.com/ where you can register and log in to the Nabto Cloud Console. Once you have registered and logged on, you will be greeted with the home page. From here click on the Products link in the sidebar.
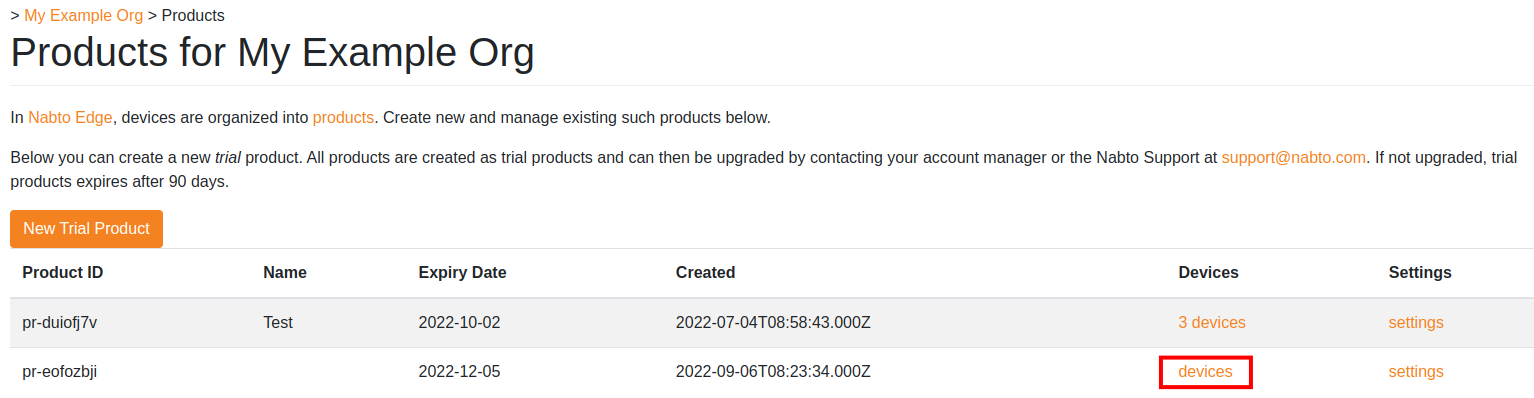
Now press New Trial Product to create a trial product. Creating a product will send you to the settings page for your new product. Return to the products page by clicking Products in the sidebar again. Now you should see that a product has been added to the list. Take note of the Product ID column.
Now we need to create a device. Click on devices on your new product.
At the moment there are no devices registered for this new product.
Press Create Single Device to create a device that we can use. You will notice a new device is immediately added to the list of devices below, and the device has a Device ID column. Click on the device to open its settings.
Take note of the Device Configuration section, there will be a JSON snippet containing exactly the information that needs to be in the device.json file of the former section in this tutorial. Do not leave this page yet, we will need to use the Fingerprint section in the next part.
Setup and run the Tunnel Application
Return to where you put the tcp_tunnel_device executable. We have two options for initializing configuration files for the program. First we have the general --init option which gives the most customization. However since we’ll be using a ready-made example app, we can use --demo-init which is a shorter and simpler setup. Let’s run the following command:
./tcp_tunnel_device --demo-init
First it will ask for your product and device ID, you can get these IDs from the Nabto Cloud Console.
Next, the TCP tunnel service is configured. We will just add a single service for this demo - the RTSP service. Recall that we set the port to 8554 and the endpoint to /video, let’s set the RTSP service settings accordingly:
Next step is to add TCP tunnel services.
What type of service do you want to add?
[0]: continue
[1]: ssh
[2]: http
[3]: rtsp
Enter a valid number (default: 1) [0-3]: 3
Enter the port of your RTSP server (default: 8554) [0-65535]: 8554
Enter your RTSP endpoint (default: /video): /video
Added rtsp service on localhost port 8554 with metadata rtsp-path => /video
Note the RTSP endpoint input. TCP tunnel services are allowed to carry some extra information for a client to retrieve when they’re using the tunnel. Think of metadata as simply being a JSON object. The Edge Video application requires a key rtsp-path that will allow it to build a URL to open the RTSP stream. In our case, we have a stream open at rtsp://127.0.0.1:8554/video so the endpoint is /video.
The interactive initialization ends at this point and the executable will print out the following at the end.
The device Fingerprint is: <FINGERPRINT STRING>
Copy the fingerprint string and paste the fingerprint into the Fingerprint input in the settings page in the Nabto Cloud Console. Without this fingerprint, the cloud console will not allow the device to connect, prohibiting remote connections.
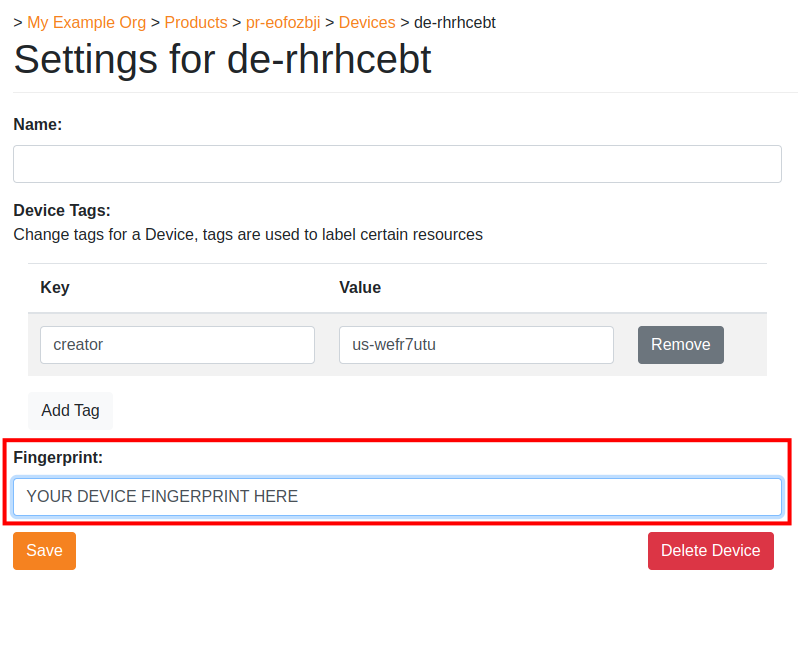
Now press save. Ensure that your RTSP stream is open and available, and restart the tcp_tunnel_device executable. It should now print Attached to the basestation after a couple of seconds. Congratulations, your TCP Tunnel device should now be available to use with the Nabto Edge Video client app.
Use the Android app with a Tunnel device
Once you have your TCP tunnel device up and running, you can use the Android app to connect to the device and use its tunnelling capabilities to connect to open the RTSP stream.
Pairing the app with a device
Open the app on your phone and press the + button to go to the pairing tab.
If your phone is connected to the same local network as the computer that is running the device application, then you can use mDNS discovery to simplify pairing by clicking the upper button:

The alternative is to add pairing information obtained from the device application in the lower field.
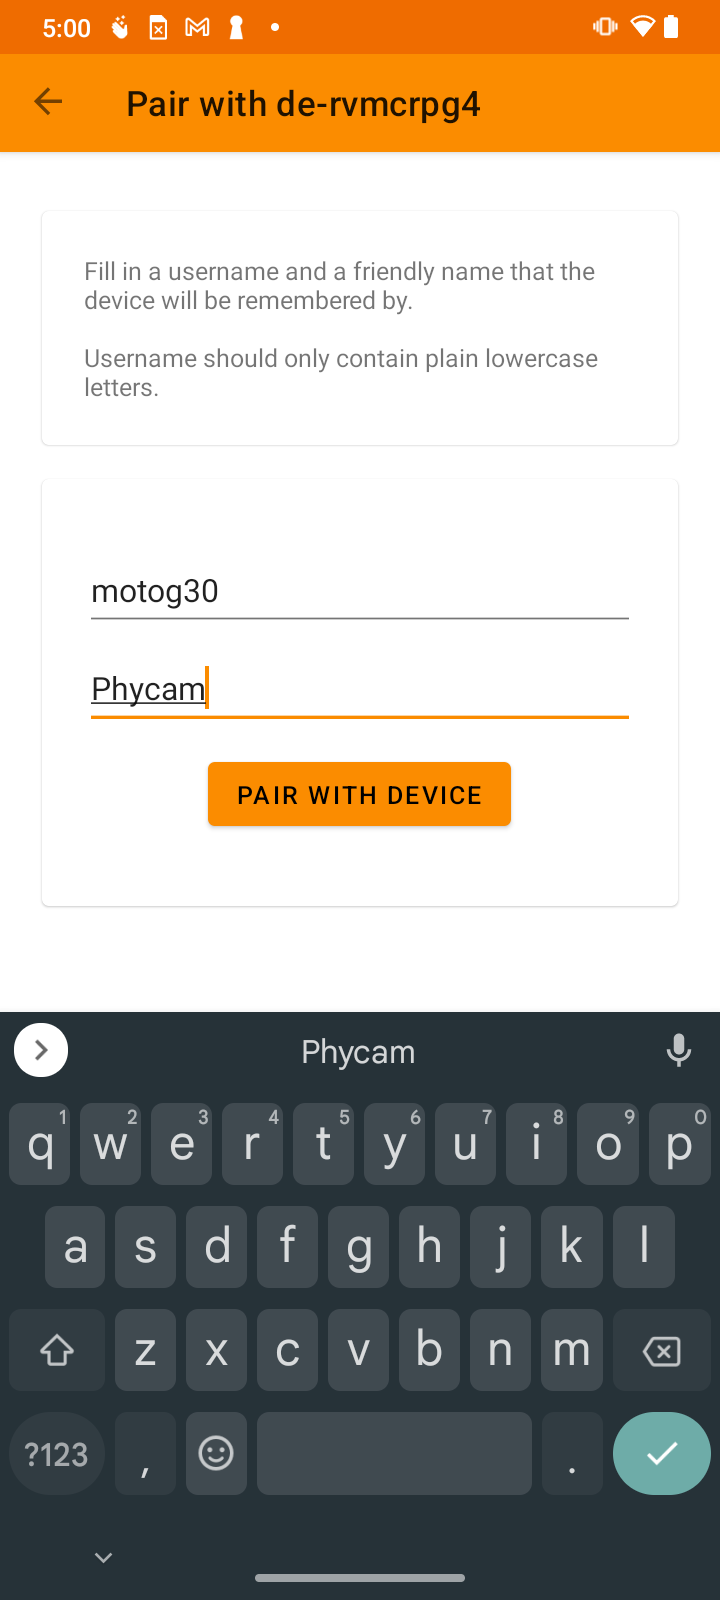
Once you are connected to a device, discovered locally or connected using the entered information, you can complete the pairing: Enter a username as you would like on the target device - the default is likely fine, it is derived from your mobile device name (change it if already taken on the target device). And provide a name for the device for your own bookmarks in the app:
Using the device
After pairing, the device is bookmarked and ready for the next time you start the app - for local or remote access. A green icon means the device is online and you have been granted access. A red icon means something prevents you from connecting to the device, e.g. the device is offline (tap the device for details).

Viewing the video stream
When tapping a device in the overview, the video stream is opened. With the default video container, You should notice a latency of not more than about a second.