Nabto Edge WebRTC Quick Demo
This guide will show how to setup and run a ready-made, self-contained Nabto Edge WebRTC demo: You will be able to start a device application that connects to an RTSP server (both included). You can then connect to the device application and watch a test video feed from the RTSP server (using a browser based client on a demo website or from native Android and iOS client apps).
First, the device application is started.
Embedded Device Application
To start the Embedded Device Application, it should be built from source and be connected to an RTSP server. To keep this guide as simple as possible, we instead use a Docker container with prebuilt binaries and all system dependencies installed and working properly. This means the only requirement to your system is to have Docker installed. If you have not already done this, install Docker using their official guide.
If you are not able to use Docker, or you are ready to move beyond this demo, see the Next Steps section for more details.
Running Demo Container
The demo container can be run through a prebuilt Docker image. To get this image, pull it using the docker command:
docker pull public.ecr.aws/nabto/nabto-edge-device-webrtc:main
Before starting the example, you need a device configured in the Nabto Cloud Console. This requires you to configure a fingerprint. To obtain this, run the demo with the --create-key argument:
docker run -it --rm public.ecr.aws/nabto/nabto-edge-device-webrtc:main edge_device_webrtc --create-key
Created Raw private key:
  badfae3acfa7ab904ac639f0c4cb0ad268d23f4e324e0708aeb567f87da0c324
With fingerprint:
  73e53042551c128a492cfd910b9ba67fffd2cab6c023b50c10992289f4c23d54
The Raw key must be used when starting the example, the Fingerprint should be configured in the Nabto Cloud Console.
If you do not already have a device in the Nabto Cloud Console, follow our general guide for embedded applications.
After configuring the device fingerprint, the example device will be able to attach to the Nabto Basestation when starting the demo. The demo application persists its list of users to a local file. For this file to persist between container restarts, create a directory to mount as a docker volume before running the demo. In addition to the device application, the container includes an RTSP service, serving an RTSP feed with a test pattern and a timestamp:
mkdir webrtc-home
docker run -v `pwd`/webrtc-home:/homedir -it --rm public.ecr.aws/nabto/nabto-edge-device-webrtc:main \
 edge_device_webrtc -r rtsp://127.0.0.1:8554/video -H /homedir -d <YOUR_DEVICE_ID> -p <YOUR_PRODUCT_ID> \
 -k <RAW_KEY_CREATED_ABOVE>
Once the demo container is running, it will show an output similar to this:
IAM was reset or config file does not exist at: /homedir/iam_config.json
  Creating one with default values
IAM was reset or state file does not exist at: /homedir/iam_state.json
  Creating one with default values
################################################################
# Initial user pairing link:
# https://demo.smartcloud.nabto.com?p=pr-jzoqqta9&d=de-uguiictr&u=admin&pwd=RE9JdhVRFvbp&sct=LVDgSEghqD1O&fp=73e53042551c128a492cfd910b9ba67fffd2cab6c023b50c10992289f4c23d54
################################################################
Device: pr-jzoqqta9.de-uguiictr with fingerprint: [73e53042551c128a492cfd910b9ba67fffd2cab6c023b50c10992289f4c23d54]
2024-01-11 14:07:53.418 ...sdk/src/core/nc_device.c(399)[_INFO] Starting Nabto Device
2024-01-11 14:07:53.421 ...libevent_mdns_udp_bind.c(203)[ERROR] Cannot add ipv6 default membership (19) No such device
medias size: 1
Using default port: 8554
Using default endpoint: video
Using pipeline (as parsed): (  videotestsrc ! clockoverlay ! video/x-raw,width=640,height=480 ! videoconvert ! queue ! x264enc tune="zerolatency" byte-stream=true bitrate=1000 key-int-max=30 ! video/x-h264, profile=constrained-baseline ! rtph264pay name=pay0 pt=96 )
Stream ready at rtsp://127.0.0.1:8554/video
2024-01-11 14:07:53.765 ...k/src/core/nc_attacher.c(747)[_INFO] Device attached to basestation
Here, note the Initial user pairing link, we will use this in the next section when connecting from a website.
Also note the log line Device attached to basestation. If this is not shown, the device is not working properly, and the clients will not be able to connect to it.
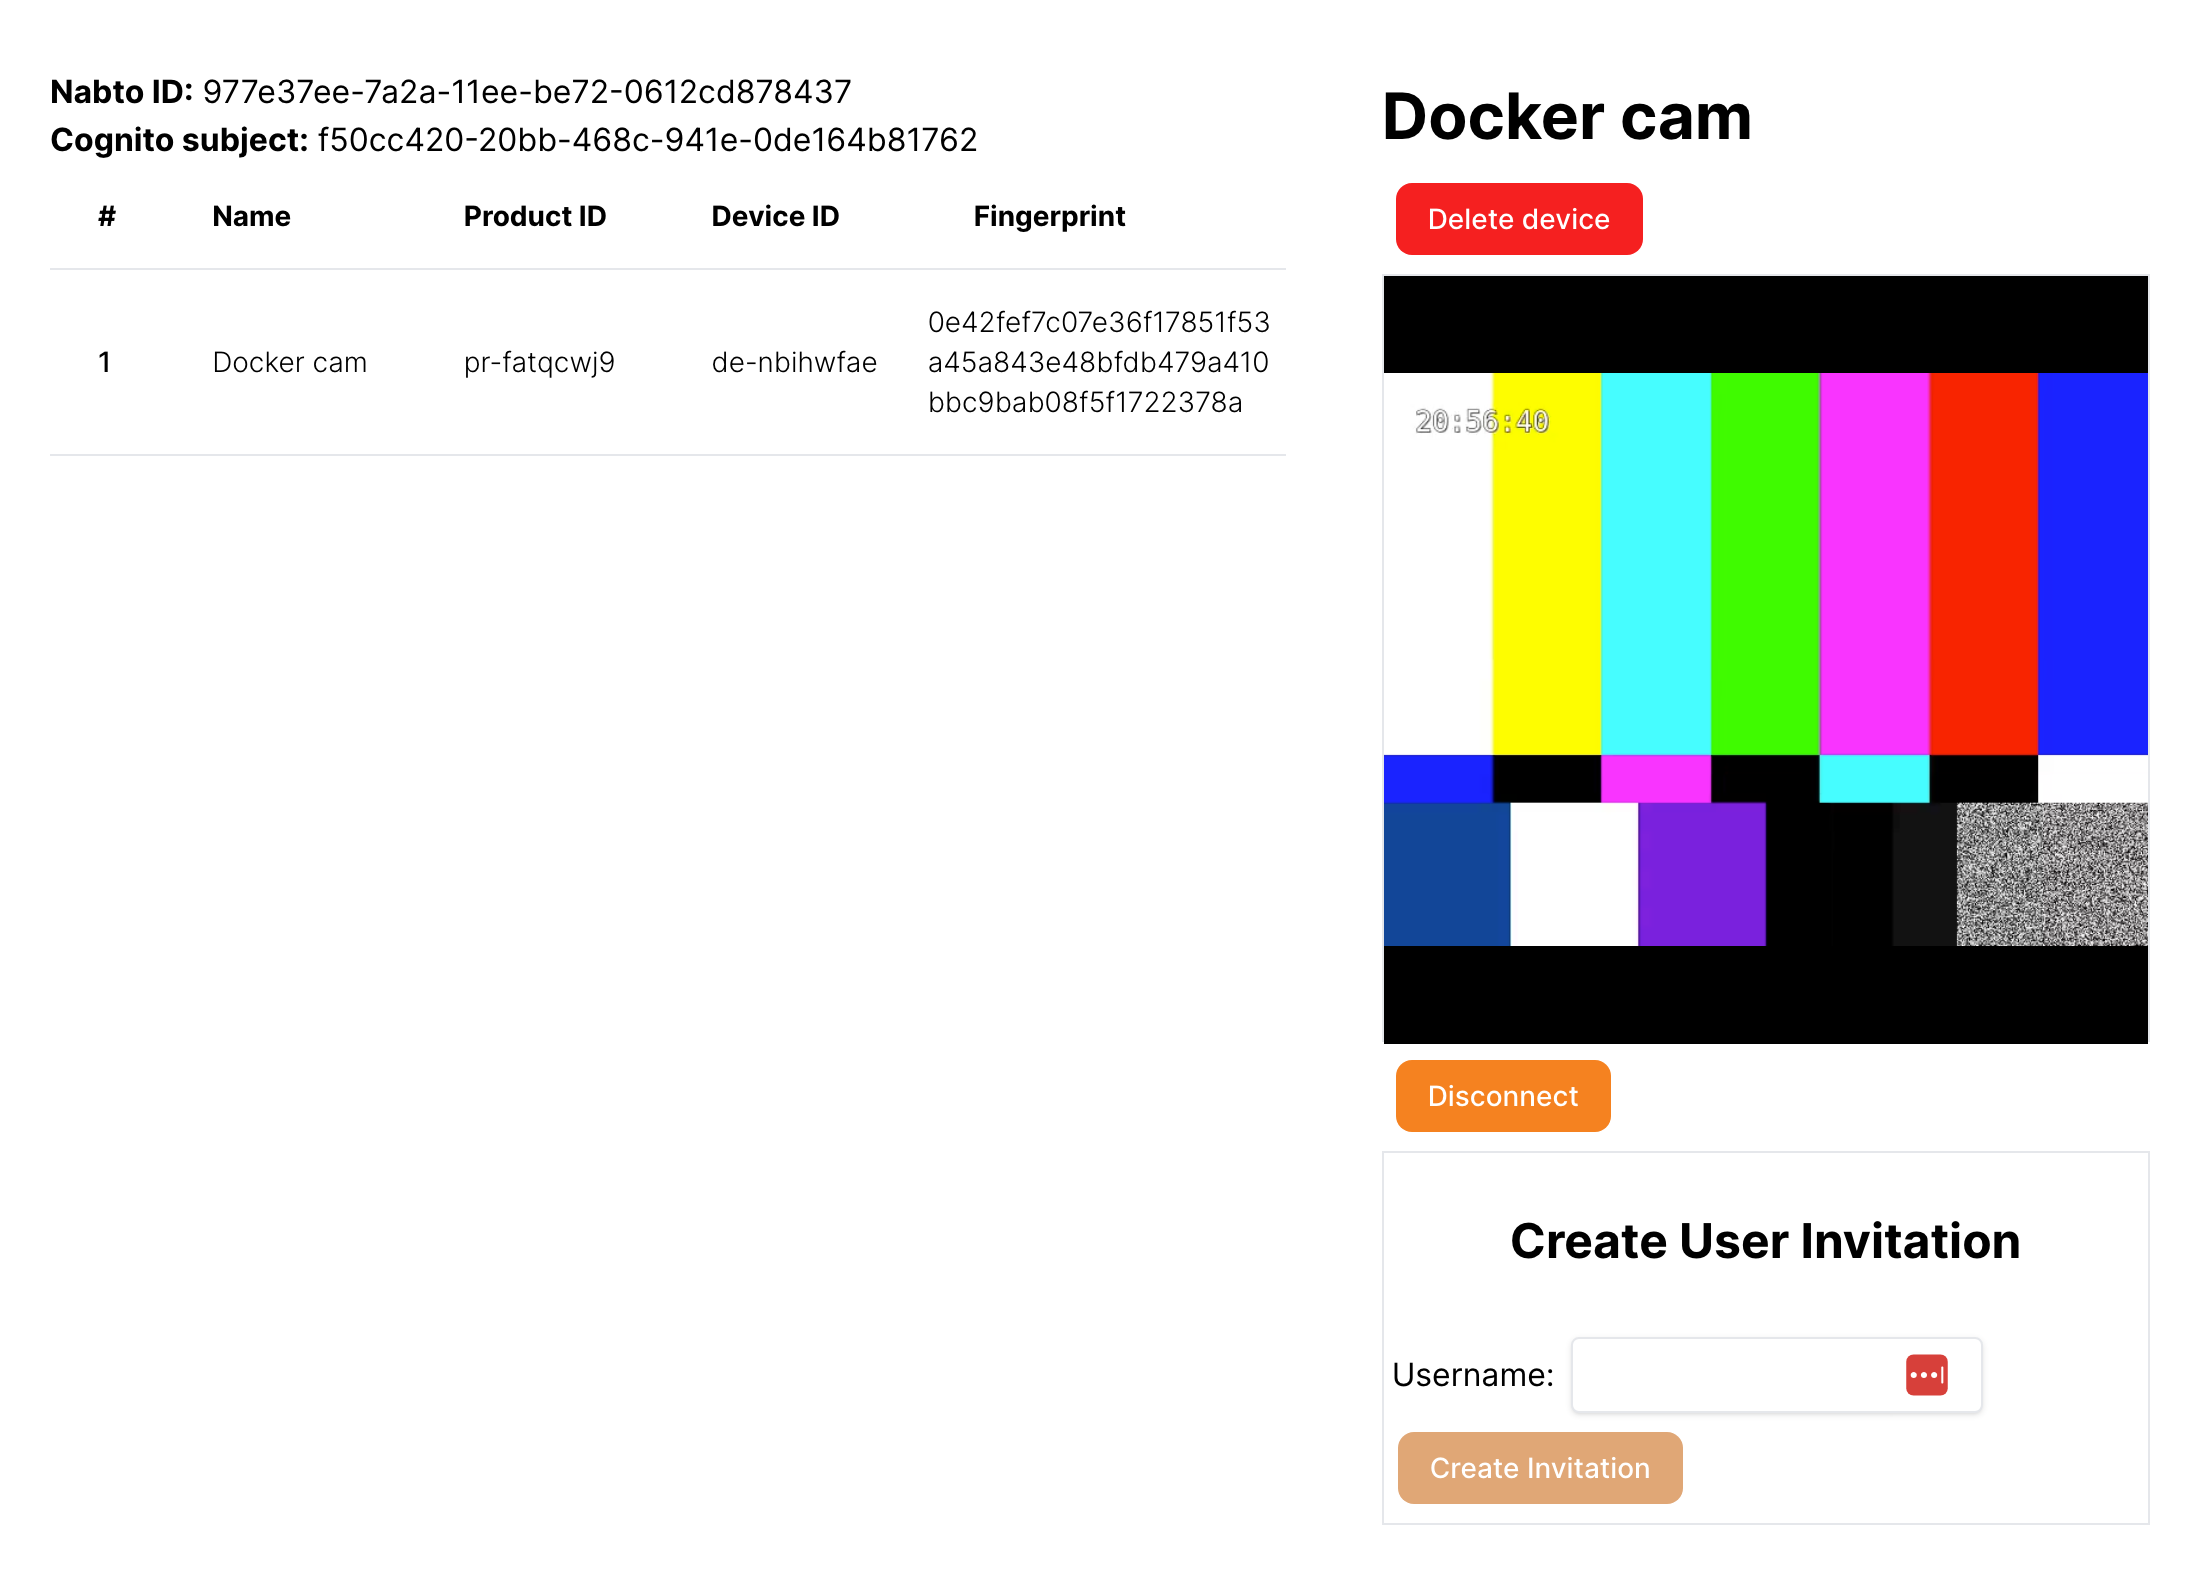
Website client connection
To connect to your device, open the Initial user pairing link URL from the previous section in a browser. This will open the Nabto WebRTC demo website and initiate pairing with the device. You must do this initial pairing through the demo website - later, you can view the WebRTC video feed from the demo native mobile apps.
First you must create an account on the website. Click Sign in, then click Sign up. Create your account using an email and a password. Once your account is verified, you will be redirected back to the device pairing flow.
Now, accept the device invitation. This will add the device information to your account on the website. The website then connects to the device, verifies the device fingerprint, performs password authentication as the initial user, configures the OAuth subject of your website account on the initial user and finally removes the password of the initial user.
When the invitation is accepted, you can go to the dashboard and connect to the device and see the video feed.
When connected to the device, you can also invite other users to your device. This will create a new IAM user on the device, and generate a link similar to the initial user pairing link allowing another user to go through the same invite flow as described here.
Mobile app client connection
The iOS and Android WebRTC example applications demonstrate how to view a WebRTC video stream in native apps. Note that these demo applications are slightly limited in the sense that they do not support initial pairing which must be done through the web client as described above. This is just a limitation of the demo to keep it simple - in principle it is possible to also do the initial pairing from the native apps.
Next Steps
This demo has shown you can start a device and get a test video feed from an RTSP server shown on a website and in mobile apps. In addition to this, the device example application supports using your own RTSP server as well as using RTP feeds directly from UDP. It also supports both sending and receiving an Audio feed along with the video feed. The example is programmed to use specific media codecs. However, they can be changed with only a few lines of code. These features require the device to be running outside the Docker container used by the demo.
How to build the device as well as details on all its features can be seen in our detailed device guide.